Bill Pay Tutorial-Online Banking
Bill Pay Tutorial for Desktop
Use the following Bill Pay Tutorial to view how to enroll and begin a transfer in Bill Pay, watch the video below.
*Please Note: As of April 1, 2025 due to our Merger with Bloom Credit Union, our mobile app has a new, updated look. Don't be alarmed by the new colors; everything you need to do your mobile banking is still there and the process is relatively the same.*
View our Bill Pay Desktop Tutorial in PDF form here or continue below.
Step 1: Log into your It's Me 247 online banking account.
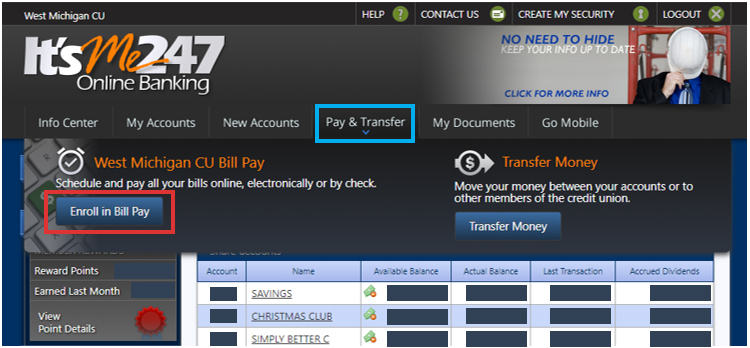
Step 2: Hover over the "Pay and Transfer" tab in the menu.
Step 3: Click "Enroll in Bill Pay" on the left side of the drop down.
Step 4: Some of the information will fill in automatically or you may need to enter in the following information:
- Email Address
- Primary Account
- Security Question
- Security Question Answer
Then Select, "Next".
Step 5: Review the information you entered into the previous screen and select "Sign me up!" or "Back" to edit your answers before you submit.
Step 7: Go to Bill Pay by selecting "Go to Bill Pay" on the previous screen or enter through the "Pay and Transfer" tab and the "Go to Bill Pay" Button.
Step 8: This will launch a new screen that does not look like It's Me 247.
Step 10: You will be taken to a screen that looks similar to this, except you will need to set up your payment options. Continue in the tutorial to learn how to set up a payment.
Step 11: There are many different types of accounts that you can set up a Bill Pay transaction including the list below or person-to-person.
- Utilities
- Phone
- Insurance
- Credit Cards
- TV & Internet
- Home
- Car
- School Other Loans
- Medical and Dental
- Charities
- Everything Else
-OR-
- Person-to-Person
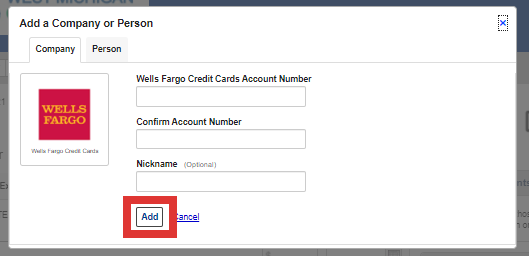
Step 12: If you are looking to set up a company to perform a transaction with, select the category of what you are looking to pay, then select the provider you are looking to make a payment to. For this example, I am selecting "Credit Card", "Wells Fargo". There are "other company" and "person" options available if your option is not shown.
Step 13: Enter your information, including; your account number and a nickname for the account if you plan to set up multiple accounts. Then click "Add".
Step 14: Once you have successfully added a new account to your Bill Pay, it will appear on the main page as an option to "Send Money". You can even set up auto-pay to schedule a set amount on a recurring basis.
Step 15: On the right side of your main screen, you can view any incoming payments, bills that are due (that you have set up), pending payments, and recent payments you have made.
Pending payments and recent payments will show both outgoing and incoming payments.
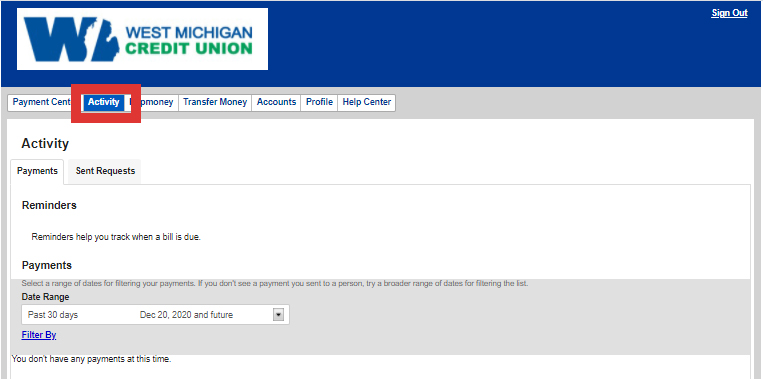
Step 16: Next to the "Payment Center" in the top menu, there are a few other options like "Activity". The "Activity" tab shows pending transactions and reminders for a set date range.
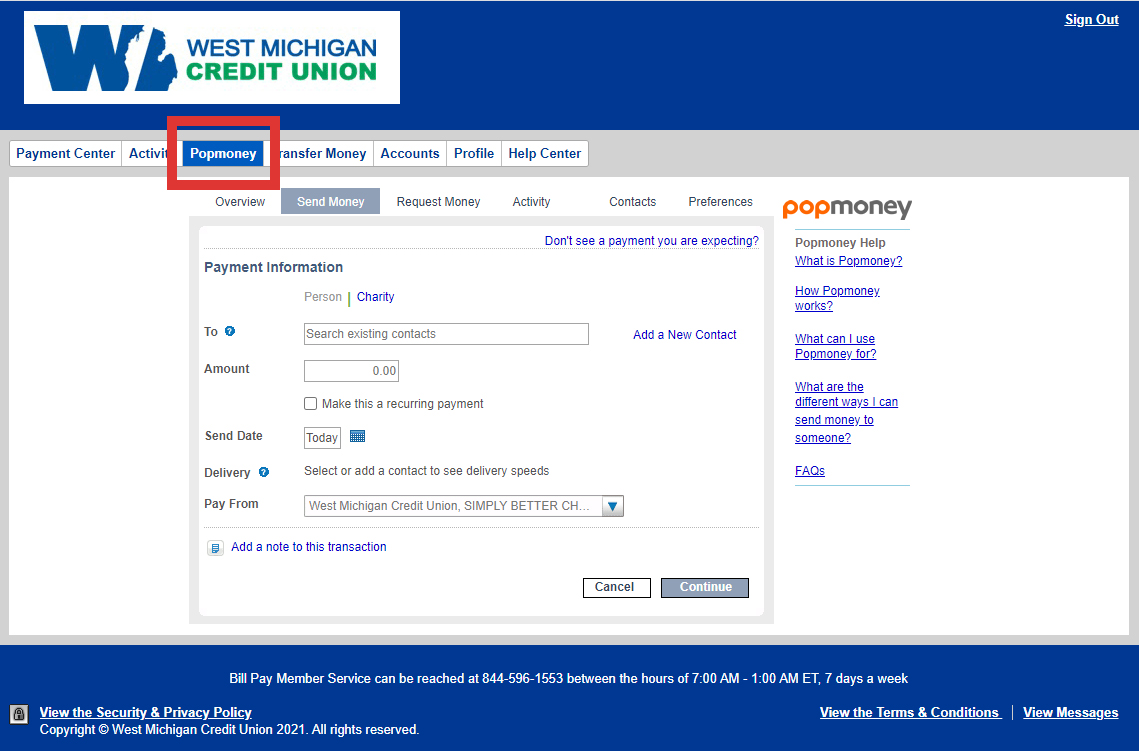
Step 17: You can also use Popmoney® through the Bill Pay feature to send money to other people. Using this feature, you can pay your family, friend, or even a babysitter.
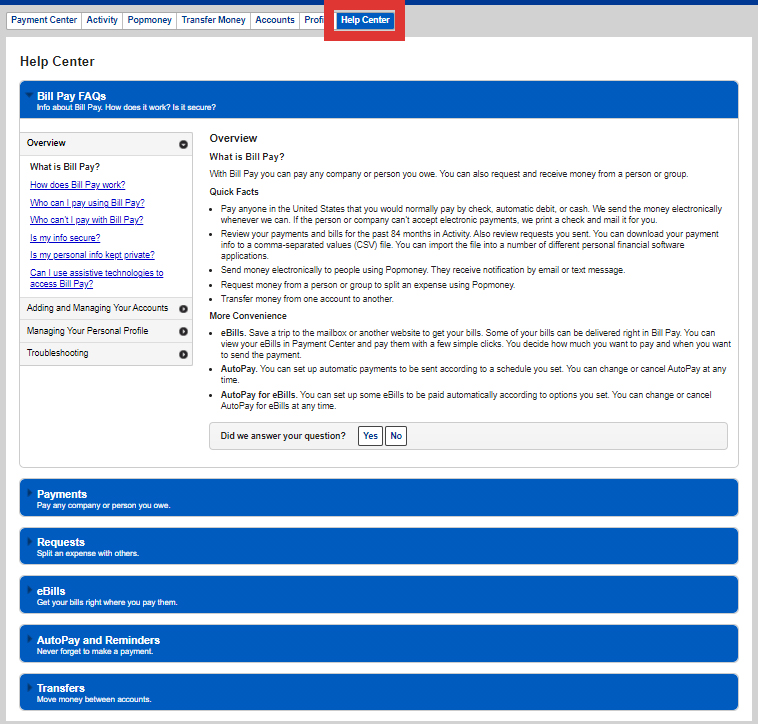
Step 18: If you are looking for additional assistance with how to perform a transfer request, look under the "Help Center" tab.
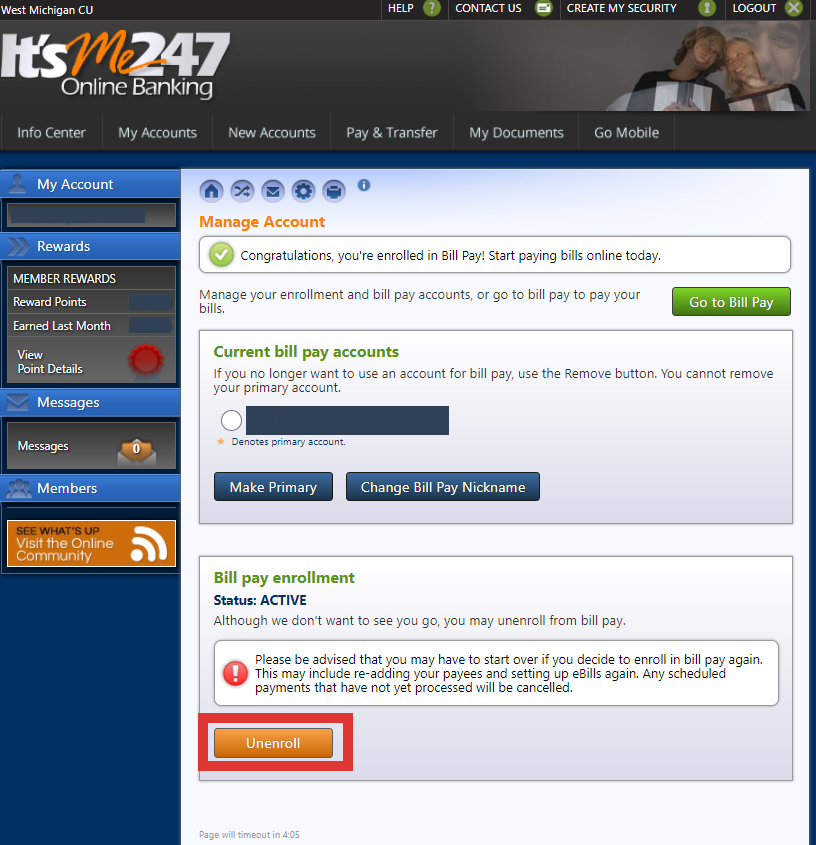
Step 19: You can choose to unenroll from Bill Pay at any time. To do so, you will need to go to the "Pay & Transfer" tab and select "Manage Account". Click the "Unenroll" button shown to the right. Please note, you may have to start over if you decide to enroll in Bill Pay again in the future!
If you have any additional questions about Bill Pay, our team would be happy to assist you. You can contact us at 1(800) 442-4576 or by submitting a contact form.
Communications
Working together as the most trusted resource to help our members' financial lives be simply better.

